 |
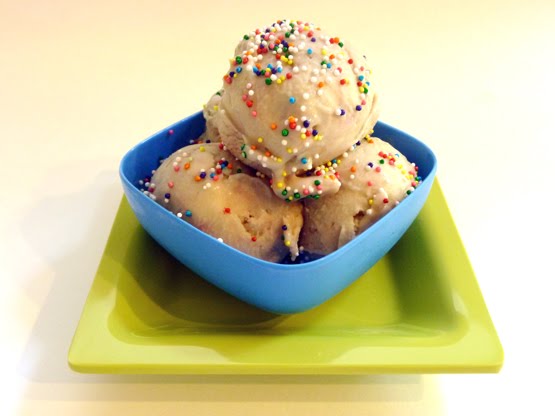
| Birthday Cake Ice Cream |
So satisfied have I been with my repertoire of banana shakes and green smoothies that my ice cream maker has spent most of the summer shoved behind the fondue pot. My freezer was so crammed-full of frozen bananas, nuts, and leftovers that it could scarcely accommodate the freezing apparatus. Fortunately, an important event stirred me to correct both these situations, and when the machine was plugged in and the bowl duly frozen, a cadre of recipes awaited in Hannah Kaminsky's e-book, A La Mode.
I made three batches over three days; it was easy with a little planning! Twenty-four hours before ICD (Ice Cream Day): find ice cream freezer and stash that baby in the, well, freezer. You can't cheat thermodynamics, so don't even try! At least 12 hours in advance: make ice cream base. Since most recipes require cooking in this step, you must allow time for the base to chill before adding it to your machine. Again, love and respect the laws of physics! Then, the fun starts.
The first recipe that I made, Peanut Butter Bombshell, turned out to be my favorite: its texture was so smooth and rich, its flavor so intensely gooberlicious, that I will definitely return to it. I used Trader Joe's chocolate Cats Cookies (yep, they're vegan!) and omitted the peanuts. Though the author notes that the cookies add "depth to this otherwise one-note ice cream," I might just leave them out next time and not tell her. Salted Creamy Peanut Butter Ice Cream, anyone?!
The perfect mate for PBIC has to be Jam Ice Cream, no? And it was a simple recipe to boot: all of three ingredients and less than five minutes of cooking time. If I have six minutes next time, I'll add a little starch to give this ice cream the custardy consistency of Hannah's other recipes. Strawberries 'n' Cream, here we come!
I couldn't put the ice cream spinner away without making something chocolate. I used this recipe, which calls for coconut milk, to produce a heavenly batch! Try it for yourself as a preview of the fantastic, frozen creations that are included in A La Mode. The recipes I tried were delightful, and the crowd of vegans and omnis who devoured them at my house seemed to agree! Next, I plan to make a batch of French Vanilla to accompany the luscious strawberries and peaches that find their way to my kitchen!
 |
| Chocolate Ice Cream |
I was so excited to receive A La Mode to review that the day it arrived in my inbox, I put my my ice cream maker's freezer bowl into the freezer. I had to wait 24 hours for the bowl to freeze completely so I thought it would be a good idea to get started on the ice cream as it too would require time to chill in the fridge before churning.
For my first recipe, I decided to make the German Chocolate Ice Cream. The ice cream base looked so thick and creamy I couldn't stop myself from trying a little spoonful before putting it into the fridge. It was absolutely delightful. Over the course of the next 20 or so hours, I frequently found myself going back to the fridge
In the book, On Food and Cooking: The Science and Lore of the Kitchen, the author Harold McGee says that the mark of a well-made ice cream is one that is, "creamy, smooth, firm, almost chewy." I am pleased to say that Hannah's chocolate ice cream base is all of the above. However, it is not for the faint of heart. This ice cream is the richest ice cream I have ever eaten and that is exactly why I love it. Other ice cream recipes I've tried produce a delicious product but a little bowl always leaves me wanting for more. With Hannah's recipe I was able to have just a few spoonfuls and feel completely satisfied. It is a great way to enjoy a sweet treat without all the guilt and pain that comes from consuming too many sugary calories.
I have made it many times since then, altering it slightly each time (omitting the coconut swirl, adding instant coffee crystals to make it a mocha ice cream, adding little brownie bites) and every variation has been just as scrumptious as the first. The picture above shows the mocha variation.
Eventually, I decided it was time to try out another recipe (for what kind of tester would I be if I only tried one of them?). I was recently in Oklahoma visiting my family and one day we took my niece, Sydney, to an ice cream shop. Sydney ordered her favorite flavor, Birthday Cake and they scooped her up an artificially colored and flavored cone full that she happily devoured.

It was with my sweet niece in mind that I made Hannah's Birthday Cake Ice Cream (pictured at the beginning of this post). I loved the idea behind it and her method for making this ice cream but, in all honesty, it was a little too sweet and thick for me. However, it's probably perfect for the little kiddos and you can feel good about serving them something without all the artificial junk. I know that my niece will LOVE it and I can't wait to make it for her the next time I see her.
* We both received free e-copies of A La Mode to review.


